WIP: Custom 3D-Printed Robot Arm
This project started fairly innocently as a simply programming project for one of my Aerospace courses. At the time, I was in my first class for my Robotics and Autonomous Systems minor in which I was learning the math and fundamentals of robotic arm control and kinematics. During this, my final project for my Flight Software Systems course had a fairly open prompt in which we simply had to make something interesting in any language. I chose to incorporate my new knowledge on robotic arm fundamentals and design my own robotic arm simulator and visualizer in python.
I began simply by incorporating matplotlib 3D plotting (as I already had experience with MATLAB as well) to display the robotic arm from 6 external joint angle sliders. This was the Forward Kinematic model of the robotic arm which I had previous experience with creating from scratch on a UR3. It uses Denavit-Hartenberg parameters to define the coordinate axis and can reliably position the robotic arm through some not so difficult matrix algebra. The next step was possibly the most daunting for me and I began on the implementation of the Inverse Kinematic model. This issue with this is that for a 6-DOF robot (especially in my configuration), there can be infinite solutions to a single point. I also had never implemented a model like this as my inverse model on the UR3 arm assumed many of the angles to remain constant, therefore allowing for a closed form solution using some trigonometry. The method I wanted however, would allow for any angle on any of the joints. I decided to use the Pseudo-Inverse Jacobian method which iteratively solves for the joint angles. I then animated the motion during the solution and implemented a custom GUI using tkinter. This was the state in which I turned in my final project.
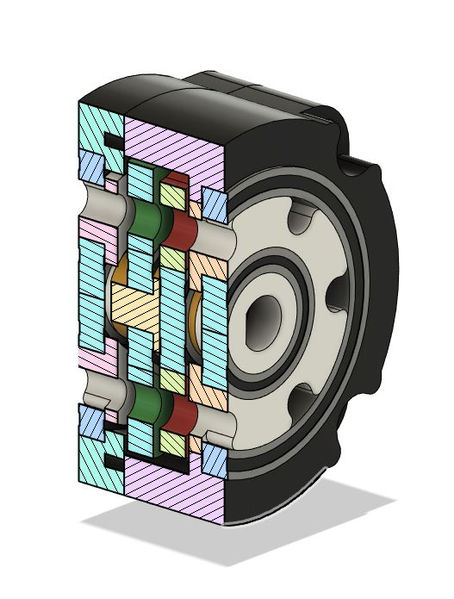
I knew while doing this portion of the project that I wanted to see this project through to the real world. I wanted to have my own desktop robotic arm. I thus began work, in my free time, on creating first a simple cyloidal gearbox (for the fact that it can be back-drivable and has geometry lending well to 3d printing applications) and then testing the hardware with an Arduino and an a4988 stepper controller. After proving that 3d printing would work for this application, I pushed forwards on the design of my robotic arm. I had based this arm mostly on Boston Dynamics, Spot robot dog's arm which is in a traditional 6R form. This leads to today where I am still working on a finalized version of the CAD to start construction, as well as refining the gearbox mechanism through iterative testing. I am also working on redesigning my kinematic model code to run in C# to allow to unity visualization or C++/Python in ROS and Gazebo (saves me headache with custom 3D modeling). My next goals include continuing to upgrade my gearbox to provide more torque as well as printing and constructing the full robotic arm for initial testing and further refinement.


